Quick Guide
Finding LR/Mogrify 2
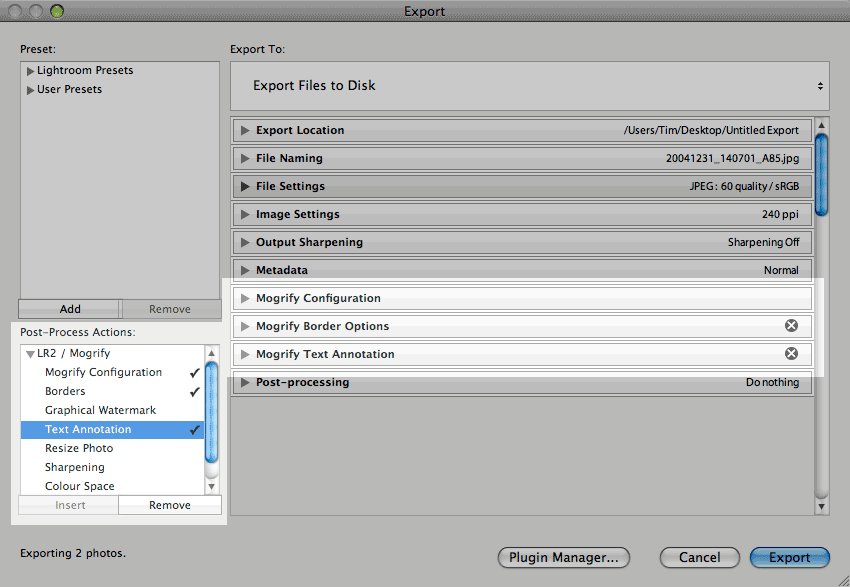
Once installed LR/Mogrify 2 can be found in the list of post-process actions in the export dialog. You may choose the
LR/Mogrify 2 features that you wish to use, and they will appear on the right hand side along with the sections that are
provided by the export plugin that you choose:
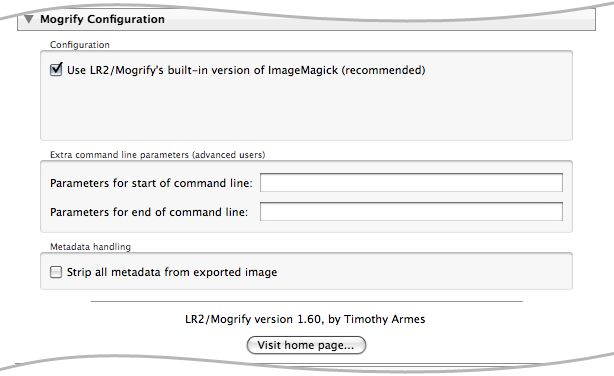
Configuration
PC users should use this panel to specify the location of the magick application that was installed by ImageMagick
(Mac users don't need to do this).
Advanced users may also enter their own command line parameters which will be passed to the application.
Outer borders
You can add any number of borders to an image, and each border can be independently defined in pixels or as a percentage
of the width or height of the image, or of the longest or shortest side (regardless of orientation).
Outer borders are added around the image, so none of the image is obscured.
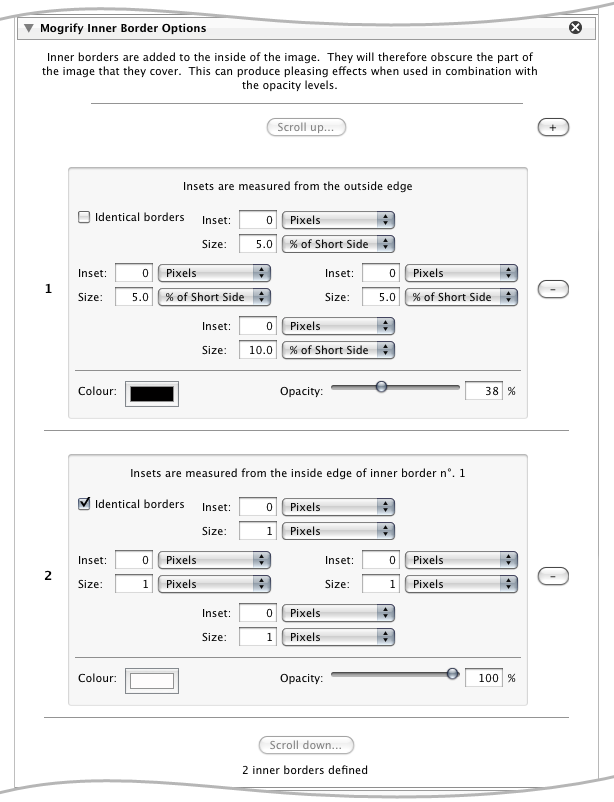
Inner borders
Inner borders are inset into the image, and therefore obscure part of the image. By varing the opacity of the border
it's possible to export images with some very creative border effects. You many create any number of inner border, and each
side may be given its own width and inset value.
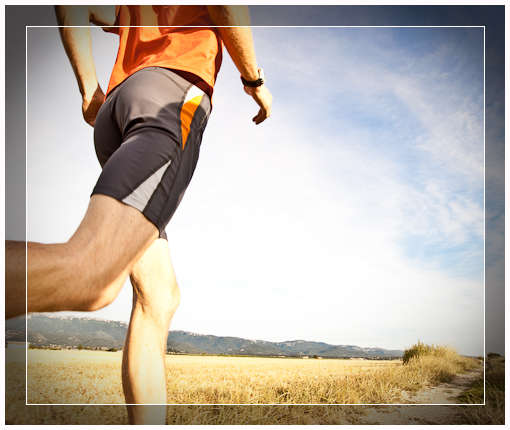
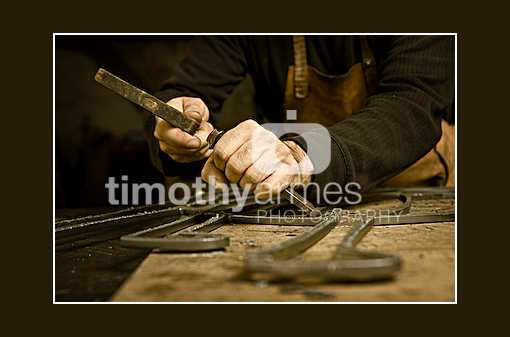
Here's an example. The combination of inner and outer border settings shown in the previous two
screenshots would produce the following result.
Graphical Watermarking
You can easily add multiple watermarks to your images.
Here's an example. The image was exported as a 400x400 pixel TIFF directly from Lightroom, then a pre-prepared
PNG file of my logo was used as a watermark, having first been resized to 300x116 pixels. Note that in this case
the PNG file is 50% transparent, so "Normal" mode was used.
A 2x2 pixel white border was added followed by a 13x12% brown border.
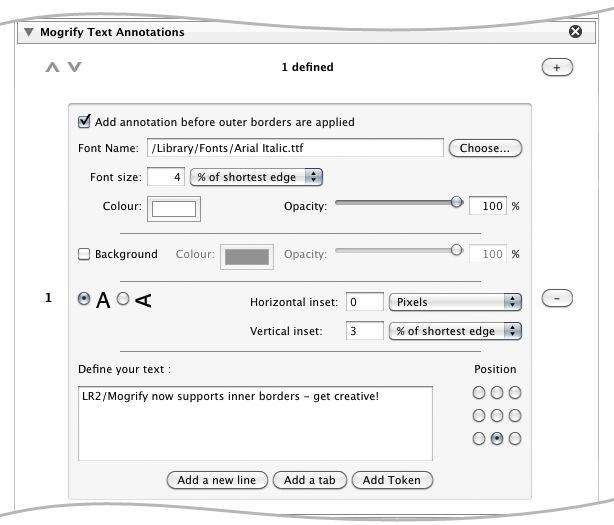
Text Annotations
LR/Mogrify 2 also allows you to add multiple text annotations to your images. The text may be broken up onto several lines, and may include references
to the photo's metadata. Simply click "Add metadata token" to add the token to the end of you text.
Metadata tokens are replaced during the export operation by real metadata from the photo.
They can easily be recognised by the curly brackets around their name. You don't need to remember
all the possible tokens, just click "Add Metadata Token" and choose one from the list.
A photo being exported may not have the particular piece of metadata that you've asked for. LR/Mogrify 2 will elide any
unnecessary punctuation that results. For example, if your template is "{city}, {state}, {country}" and state happens to be empty,
you'd have "Paris, France" and not "Paris, , France".
Another approach is give a value to be used in case of missing metadata. To do this, separate the token name from the
value by a comma. For example, {shutterSpeed,Unknown speed} will result in 'Unknown speed' if the shutter speed
information isn't available.
The replacement can even contain other tokens. For example, {dateTime,{dateTimeOriginal}}. And this can go on without
limit:
Date and time: {dateTime,Original date and time: {dateTimeOriginal,Digitised date and time: {dateTimeDigitized}}}
Furthermore, metadata for the various dates and times can be formatted according to your own specification.
The format should be giving in square brackets following the token name, as this example shows:
{dateTime[%Y/%m/%d %H:%M],No date or time found}
The format can contain the following special character sequences for time and date elements:
- %B: Full name of month
- %b: 3-letter name of month
- %m: 2-digit month number
- %d: Day number with leading zero
- %e: Day number without leading zero
- %j: Julian day of the year with leading zero
- %y: 2-digit year number
- %Y: 4-digit year number
- %H: Hour with leading zero (24-hour clock)
- %I: Hour with leading zero (12-hour clock)
- %M: Minute with leading zero
- %S: Second with leading zero
- %p: AM/PM designation
- %%: % symbol
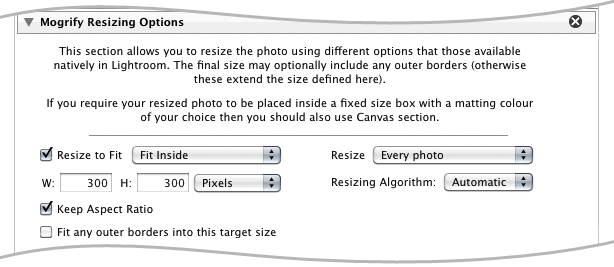
Resizing options
You may choose to resize your images using Mogrify. In comparison to Lightroom's standard resize options this
will allow you to choose between a number of advanced resizing algorithms to suit your taste. You can also
resize to a given total number of pixels regardless of aspect ratio, which is useful for stock photographers
who have to supply images with a certain number of pixels.
The "Fit any borders into this target size" option will
try to fit and borders that you're adding into the size that
you set here. The image is therefore made smaller to allow
for this.
This will override any sizing constraints that you set using Lightroom's standard size options in the Image Settings tab.
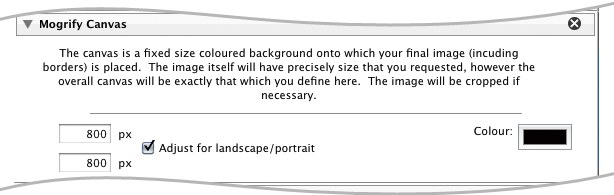
Canvas Option
There are times that you may be asked to produce a fixed size image. For example, some photo
laboratories may require this, or you may wish to display images on a projector.
The canvas option allows you to define the absolute final output size of your image. The image is first resized using the other
options available, and borders are added. The images is then places on the fixed size canvas, which may have any colour you choose.
If the image is bigger than the canvas then it will be cropped.
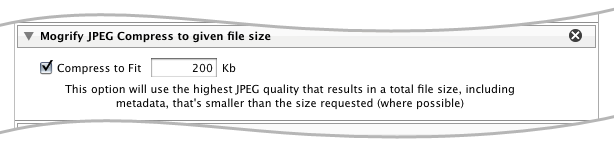
Compressing JPEGs to a target file size
This option is intended for creating the highest quality JPEG possible that'll be no larger than the requested file size (metadata included).
You may find this useful for websites that limit the maximum file size that you can upload.
To achieve this magic LR/Mogrify 2 first creates a Tiff file using all your other settings (watermark, annotations, etc.). It then has to
convert the Tiff file to a JPEG at various quality settings to find the optimum quality. Up 9 JPEG conversions are required per exported file -
please be patient!
Sharpening options
You can also sharpen your images from here; the sharpening is applied after the resize operation. This option has really been
made obsolete by Lightroom 2's own export sharpening option, however I've kept the panel for those who prefer ImageMagick's
sharpening tools.
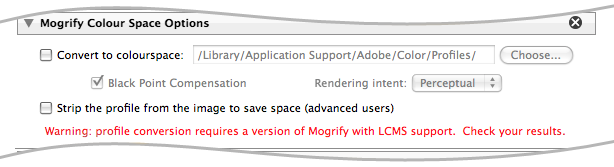
Colourspace conversion
LR/Mogrify 2 can be used to convert your exported image to other colourspaces. You'll need to browse to the ICC profile concerned.
If you know that the image will be used by a non-colour managed system then you may choose to remove the profile in order to
reduce the image size (the conversion can still be applied before this is done). If you don't understand
enough about colour management to know if you should be doing this, then I recommend that you leave the
profiles intact.
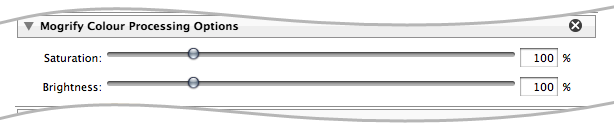
Colour Processing
Finally, the ability to adjust the brightness and saturation of the image on export may appeal to those who like
to adjust their images for typical web viewing on uncalibrated monitors.
|