Capture Time to Exif
How to use the plugin
Key steps
- Select the pictures in Lightroom's Library - Grid view is best
- Run the plug-in using the menu item Library > Plug-In Extras > Capture Time to Exif
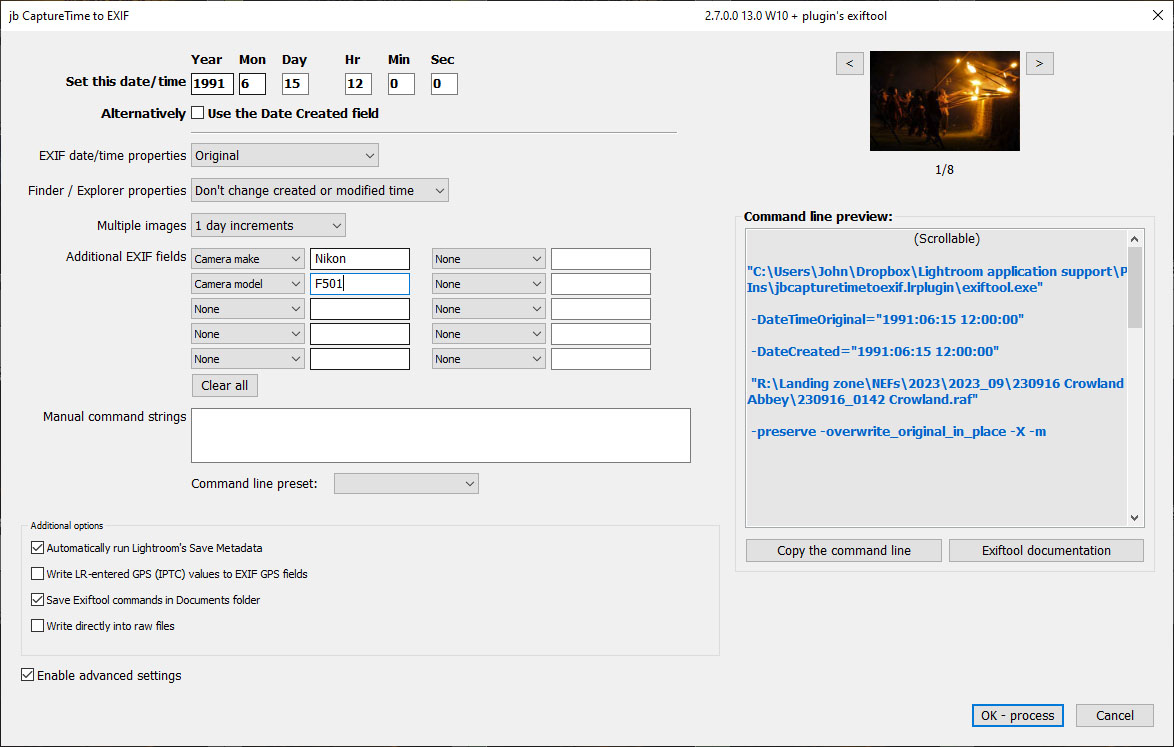
- If you want to change EXIF dates
- Either enter a single date to apply to all the photos, or
- Check the Use photos' Date Created field if you have previously entered individual dates in the Metadata panel's Date Created field
- Enter any changes to the camera model or lens
- Generally, leave the Automatically run Lightroom's Save Metadata enabled.
- Press OK - this runs the Exiftools command and closes the dialog box
- Wait a few moments to let Exiftool finish working
- Use Lightroom's Metedata > Read metadata from Files
Advanced use
Command lines
jb Capture Time to Exif uses Exiftool to write to the files and it is - quite rightly - strict about the syntax of command lines. As shown in the screenshot, you need to enter a "tag name" preceeded by a "-" and followed by "=". Then enter the value in doble quotes. Also avoid non-ASCII characters - my own preference is to avoid all non-alphanumerical characters in metadata.
To see an example of the syntax, choose "Sample command line" from the "Preset" drop down box.
Raw files
If you want to use the plugin to update raw files, the Write Directly check box tells the plugin to do so. However, LR's Read Metadata command looks for an xmp file, reads its metadata, and then ignores the raw file. In general:
- process raw files before making adjustments or adding IPTC metadata
- don't enable Save Metadata
- ensure that there are no xmp files in the folder
